So here's how you can make this pretty summery sundress for your lil one & with a little imagination & calculating skills for yourself too;)

Hey I did not notice the mango there in the pic.That's from my mango tree:)
She is standing under it............sorry,back to the tutorial;)
You will need 1/2 to 1 yard of fabric depending on size.My daughter is 3 but she is a verrrrrry thin child so I needed a little under 1/2 yard.
Also contrast bias tape & a little leftover fabric for the rose on the pocket.
Lets start
1.Cut 2 rectangles of following dimensions.Measure your child from collar bone to wherever you want the hem to be .Add 1.5" to it & that will be the length.Take any dress which fits your child well & measure its width at the hem .Add 1" to it & that will be your width.For me I cut 2 rectangles 20" long & 16" wide.
2. Now fold them lengthwise right sides together & mark 6" vertically & 2" horizontally at the corners .
Join the 2 lines to form a rectangle & make a J shape for the armholes like this.Repeat this for both sides.


This is what the pieces will look like
3. Now fold the top edge 1/2" inside & sew it for both pieces.

4.Now comes the magical bias tape:)
Its so much easier to use a bias tape on the armholes..........besides it looks much more neater & professional.Now pin the bias tape like this on the wrong side of the fabric on the armhole.Do this for all 4 armholes.

5. Sew along the curve neatly.

6.Now fold this over to the right side & pin evenly all along the curve.

7.Now sew it & you will get pretty professionally finished armholes.

8. Fold down the top edge another 1/2" towards the back & sew creating a tunnel for the elastic to go in later.Repeat for both sides.Now cut 1 strip in a coordinating fabric the length of the top edge of the front & 2" wide.Serge 1 end lengthwise & the two ends width wise.I do not have a serger so I just sew them.Pin this strip on the top edge of the front like this & sew it with a 1/4" seam allowance.

9.Flip down this strip & top stitch it.The 1/4" seam allowance results in this little fabric showing on top which looks really elegant.

10.Now we will finish the hem.Take the bias tape & pin it along the wrong side of the hem like this for both the sides & sew it.

11.Now flip over the bias tape to the right side so that a few cms of the dress fabric along with the bias tape is visible on the right side.Sew it.Repeat for the back piece too.

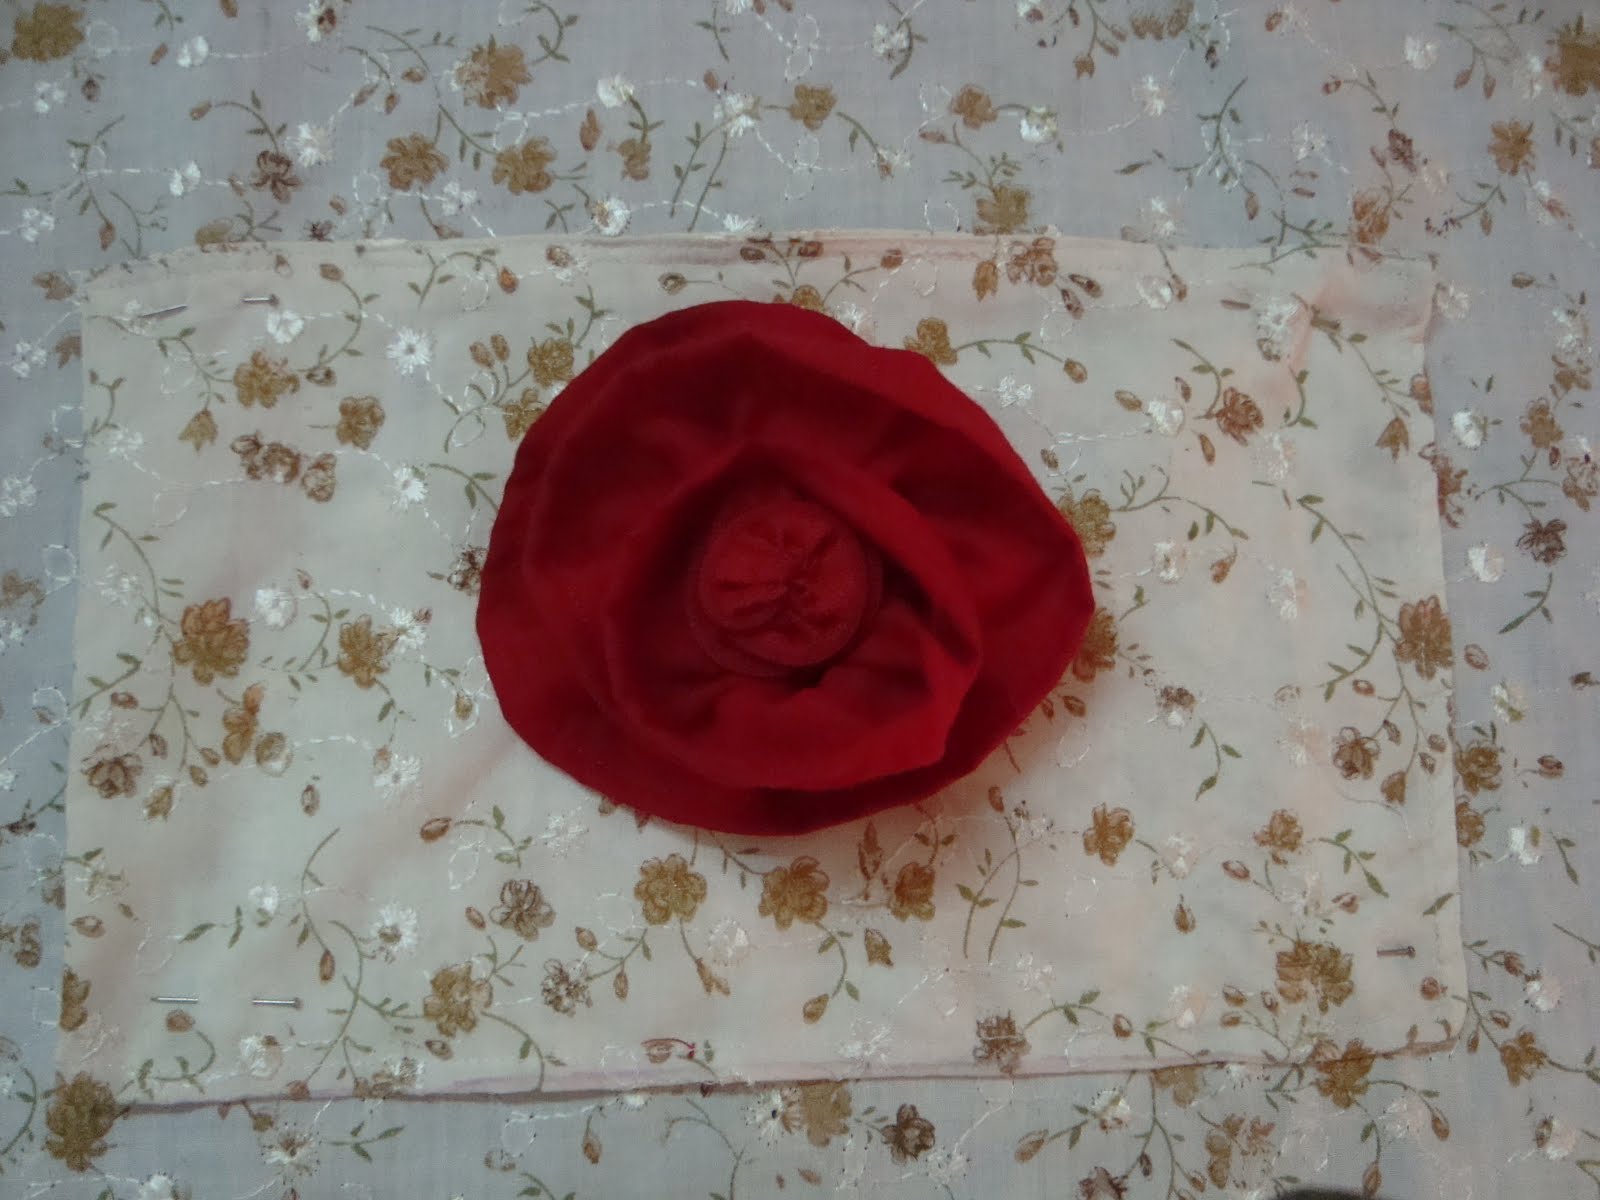
12. Make a rosette using the co-ordinating fabric from my tutorial on How to make rosettes using leftover fabric & zip tape.
Now to make the pocket.Cut a rectangle 10.5" by 12".Mark a line in the center ie 6" from the top.You have now divided the rectangle into 2 halves 10.5" by 6".Now mark the center of one of the halves like this & tack down the rosette .

13.Fold the rectangle into half at the 6" line you had drawn right sides together so that the rosette is between the 2 layers

14.Sew the two sides & turn the pocket inside out.Fold over the unstitched edge 1/2" inside,pin & top stitch it neatly.

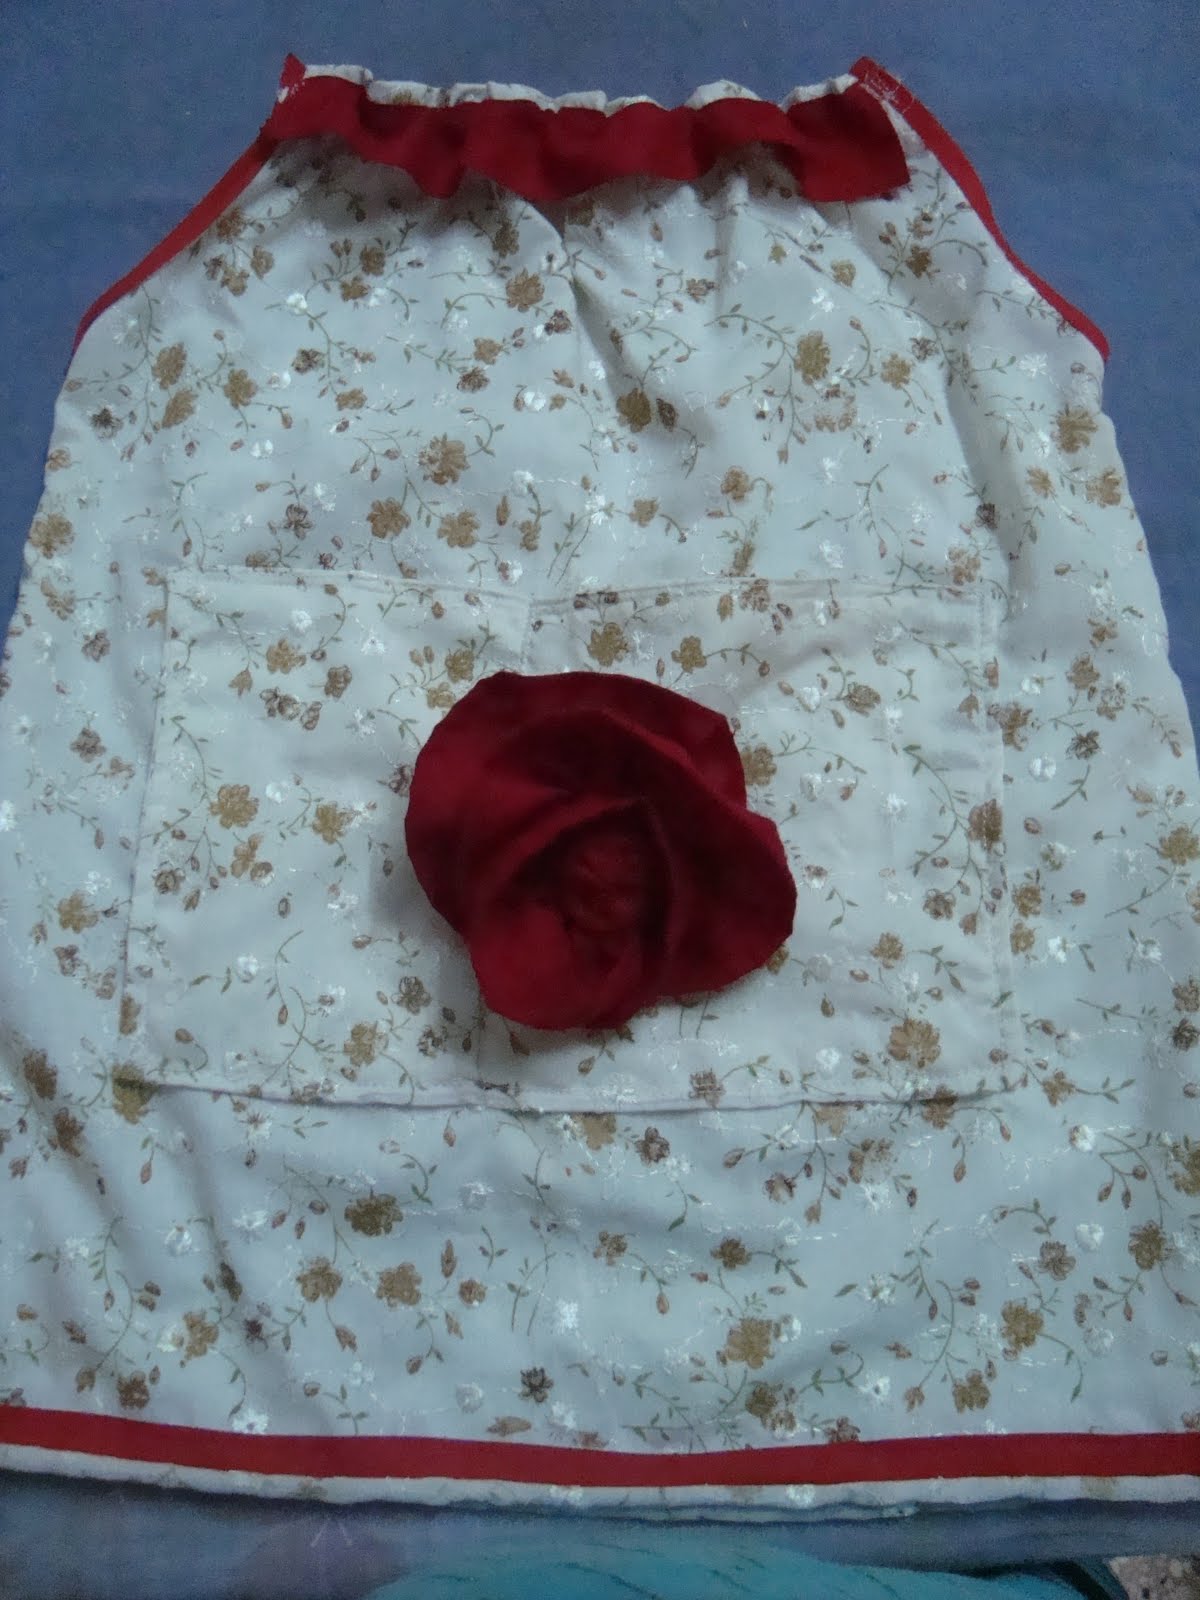
So now you have a pocket with a rosette in its center.Pin this pocket on the dress in the center.
15.Sew the three sides of the pocket .Don't forget to backstitch the edges..Now to make the divider.Just flip the rosette to one side with your finger & draw as close to the center as you can.Sew on that line backstitching both the edges. Your pockets are done!!!!!!!

16. Now measure your child from armpit to armpit,lets say it is x" , cut 2 pieces of 1/4" elastic the length of (x-1)".For my daughter her armpit to armpit was 7" so I cut 6" long elastic strips.
Put a safety pin on one edge & thread it through the tunnel you created earlier.

17.When the other edge of the elastic reaches the entry point,sew the gap shut along with the elastic.Run a few stitches so the elastic will not go back inside .

18.Now take the safety pin out from the other side ,stretch the elastic all along & run a stitch lengthwise.At the other end too sew the gap shut along with the elastic.Repeat this for both the sides.

19. Put front & back together right sides facing ,match the hems & armholes & pin them together.Now sew both the sides backstitching at the edges.
20.Now the last step of putting the straps.Cut 2 pieces of the bias tape 3" long.Fold them over at the center & sew the edges shut.Now simply pin them at the top & sew them neatly & securely.(I made them out of the red fabric & realized later that I could have simply used the bias tape:)))

& Tadaaaaaaaaaaaa..................

 Don't forget to link back if you use this tutorial;)
And put pics in my flickr group
linking to


9 comments:
nice one...
Super cute...I love the last picture of your daughter too....what a little diva... :-) Hope she has a great birthday!
Thank you for sharing this! The dress is cute but your daughter is gorgeous!!!!!!
So cute, I loved the dress and the fabric too.
What a cute dress, I love the big front pocket! :)
votre petite fille est très jolie, avec sa petite robe!!!!
j'aime beaucoup votre pays, je suis restée quelques mois au Rajasthan, j'aimerais y revenir!!!
good luck
Someone looks very happy in her new dress.
What a great idea with the big pocket.
I sure would have liked a dress like this
one when I was younger. Oh! What I could
have put in the pocket? A rock? A doll?
Or maybe just my hands?
Thank you for sharing.
So sweet! Thanks for sharing. Your use of color is so wonderful!
This dress idea is great! WIsh I had a dress like that when I was younger..and She looks sooooo adorable wearing it..like someone rightly said here..shes really a lil diva!!! mwaaaa
Post a Comment